How to Set Up a Convenient Charging Station for Your Devices
Creating a dedicated charging station for your devices can simplify your daily routine, reduce clutter, and ensure that your gadgets are always powered and ready to go. Whether you have smartphones, tablets, smartwatches, or wireless earbuds, a well-planned charging setup can keep everything organized in one place.
In this post, we’ll guide you through the process of setting up a convenient charging station, from choosing the location to organizing cables and selecting the right accessories.
Why Set Up a Charging Station?
With the number of devices we use every day, charging cables often end up scattered on desks, counters, or nightstands. This not only creates clutter but can also lead to misplaced chargers and tangled cables.
A dedicated charging station helps by:
– Keeping all your chargers and devices organized in one spot
– Reducing the chances of lost cables or adapters
– Keeping surfaces neat and free of clutter
– Allowing simultaneous charging of multiple devices
– Streamlining your charging routine, saving time
Step 1: Choose the Right Location
Selecting a suitable location for your charging station is the first step. Here are some tips:
– Accessibility: Choose a space that’s easy to reach and where you spend a lot of time, such as a desk, living room console, or bedside table.
– Power Source Availability: Ensure there is a power outlet nearby to plug in your chargers without needing extension cords.
– Safety: Avoid placing your station near water sources, in high-traffic areas, or where cables could pose a tripping hazard.
– Ventilation: Some chargers and devices may heat up during charging, so pick a spot with good airflow.
Step 2: Gather Necessary Supplies
Depending on your devices and preferences, your charging station can be as simple or elaborate as you wish. Consider having:
– Multi-port USB charger: A charger with several USB ports enables charging multiple devices simultaneously and reduces the number of wall adapters required.
– Charging cables: Collect the cables compatible with your devices (USB-C, Lightning, Micro-USB, etc.). Having an extra cable or two can be handy for guests and replacements.
– Cable organizers: Cable clips, sleeves, or ties help manage and separate cables to prevent tangling.
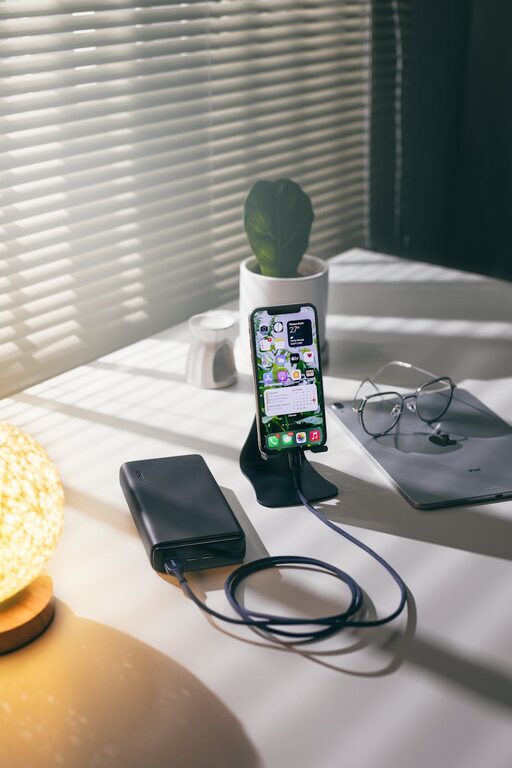
– Charging dock or stand: These accessories hold your devices upright while charging, making it easy to view notifications or use your device without unplugging.
– Storage containers: Use small baskets or boxes to keep chargers, earbuds, and accessories neatly contained.
Step 3: Set Up Your Power Source
Use a Multi-port USB Charger
One of the best ways to keep things tidy is to use a multi-port USB charger. Instead of plugging in several individual wall chargers, a multi-port charger allows you to connect multiple devices to a single power outlet. When choosing one:
– Ensure it supplies enough power to charge all devices efficiently. Look for chargers that support fast charging if your devices are compatible.
– Check that it supports the types of connections your devices use (USB-A, USB-C).
Manage Power Strips and Surge Protectors
If you need to use power strips or surge protectors, select models with built-in USB ports and safety certifications. Keep cables off the floor as much as possible to prevent damage and accidents.
Step 4: Organize Your Cables
Messy cables can defeat the purpose of a charging station. Here are some ways to keep cables under control:
– Label cables: Use small tags or colored markings to quickly identify each cable’s purpose.
– Use cable clips or holders: Attach them to the edge of your desk or charging station surface to guide cables neatly.
– Bundle excess length: Avoid long, hanging cables by shortening them with reusable ties or wraps.
– Cable boxes: Place power strips and cable connections inside a cable management box to hide clutter.
Step 5: Position and Arrange Your Devices
Place your devices in a way that is easy to interact with while charging:
– Use stands or docks to hold phones and tablets upright.
– Make sure devices have enough space around them for airflow to keep them cool.
– Arrange devices by how frequently you use them or by charging priority.
Step 6: Keep Extras Handy
It’s useful to keep a few extras close to your charging station:
– Spare cables
– Power banks for on-the-go charging
– Cleaning cloths to wipe screens
– Small containers for chargers, adapters, or batteries
Step 7: Maintain Your Charging Station
Once set up, maintaining your charging station helps it stay organized:
– Regularly check cables for wear and replace if needed.
– Tidy up cables and accessories weekly.
– Unplug devices fully when charged to avoid battery strain.
– Keep the area dust-free.
Additional Tips for a Better Charging Station
– Wireless charging: Consider adding wireless charging pads for compatible devices to reduce cable clutter.
– Label power outlets: If multiple people use the charging station, labeling outlets or cables can help avoid confusion.
– Personalize your space: Use decorative trays, coasters, or mats to blend the station with your home or office style.
—
Setting up a dedicated charging station does not have to be a complicated process. With a bit of planning and some simple accessories, you can create an efficient and stylish spot that keeps your devices charged and organized.
Give these steps a try to make your charging routine smoother and less cluttered!